


Description
Cardboard Shadow Boxes Wholesale For Art, Retail And Memory Projects
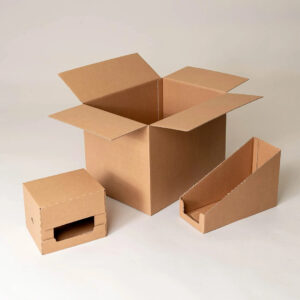
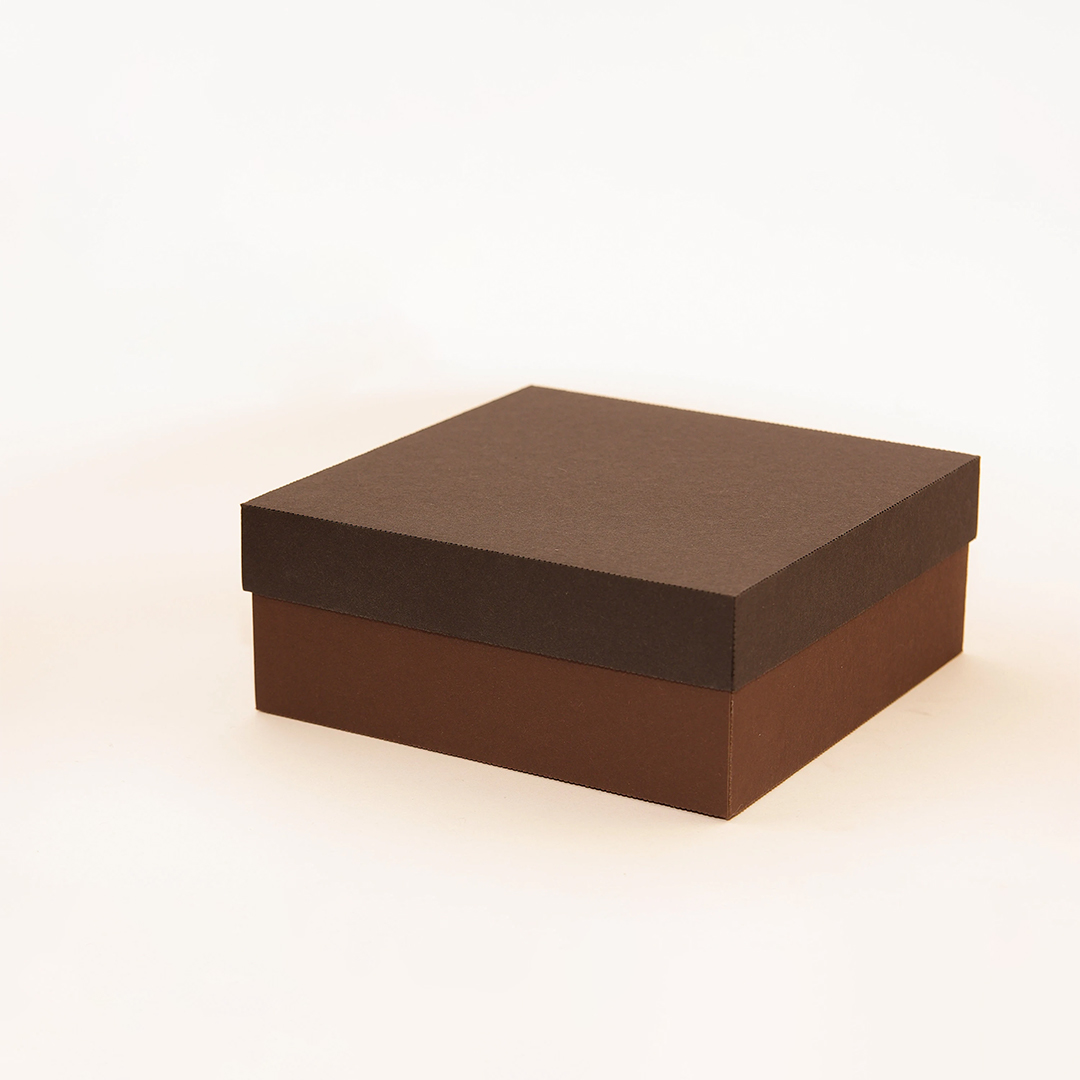
Cardboard Shadow Boxes give brands a calm way to present layered scenes, keepsakes and product stories inside a protective frame. People searching how to make cardboard shadow boxes, how to make a shadow box, or a simple Cardboard shadow boxes template often need packaging that supports layered art while still moving safely through storage and delivery. Many teams that prepare framed sets for shipping also rely on Cardboard Partitioned Insert Boxes so each finished piece sits in its own supported space inside the transit carton. These boxes act like a deep Shadow Box Frame built from cardboard, with room for 2D prints, 3D elements and small objects arranged in depth without losing their layout.
Brands planning sets of framed art, collectibles or crafted scenes can run small batches for local shows and larger runs for retail chains using the same core sizes. This consistency helps when cartons are stacked, moved across warehouses and unpacked by different teams. Cardboard shadow boxes diy ideas tested in small studios can be scaled into production-ready runs that still respect the original layered design, keeping edges clean and depth intact from workbench to final display.
What are cardboard shadow boxes and why brands use them
Cardboard shadow boxes are deep cardboard frames that keep a gap between the viewing front and the backing panel so items can sit at different distances from the eye. This structure lets you mount photos, prints, cut-outs and small objects together, building a layered scene instead of a flat poster. The same approach supports display packaging for gifts, seasonal sets and collectible editions where the way items are arranged is part of the overall experience.
Many buyers also search How to make a layered shadow box or How to make 3D shadow box art and still need packaging that moves these pieces safely to the final location. Cardboard Shadow Boxes allow this layered artwork to travel in its own display-ready container, so staff do not have to reframe or rebuild it at the store. Once the carton is opened, the piece can move straight to shelf, counter or gallery wall with only light adjustment.
Key uses of cardboard shadow boxes
- Presenting layered paper art and multi-level prints
- Displaying limited-edition merchandise, pins and small collectibles
- Framing jewellery cards, accessories and themed product bundles
- Holding photo memories with tickets, charms and personal objects
- Packaging seasonal gift sets for events and special promotions
- Creating storytelling displays where depth supports the message
- Supporting Cardboard shadow boxes diy craft ranges and home décor pieces
Planning priorities when choosing shadow box packaging
- Decide if the box will serve as the finished frame, transit pack, or both at once.
- Measure depth so layered artwork, spacers and covers all fit without pressure.
- Choose board strength that supports stacking in backrooms and on pallets.
- Consider clear windows where you want content visible before opening.
- Plan hanging points or stand options depending on wall or shelf display.
- Match print and colours with the story behind the layered scene inside.
- Coordinate outer sizes with your shipping system so loads stack in predictable patterns.
| Aspect | Details | Material choices | Print and finish choices | Extra options and features | Typical uses |
|---|---|---|---|---|---|
| Frame depth | Space between front and back for layered scenes | Single wall and stronger grades as needed | Plain, gloss or matte style on outer walls | Optional clear front panels | Layered art sets, keepsake frames, display gifts |
| Front opening style | How the viewer sees into the box | Full front, partial window or shaped cut-outs | Solid colours or printed artwork borders | Extra flaps for dust and light control | Retail shelves, counters, gallery merchandising |
| Internal mounting area | Surface to attach prints, objects and props | Kraft or white interior options | Printed backdrops or neutral tones | Pre-scored marks for simple alignment | Memory projects, collages, themed collections |
| Edge protection | Strength around corners during stacking and transit | Reinforced edges or layered board | Printed handling icons if required | Corner supports or internal pads | Shipping to stores, online orders, art fairs |
| Display hardware support | Ways to hang or stand the finished piece | Hook-ready backs or stand flaps | Subtle markings to guide orientation | Die-cut holes or separate card stands | Wall hanging, shelf display, pop-up layouts |
| Recycling and reuse | End-of-life and ongoing utility | Recycled fibre blends available | Water-based inks for brand stories | Designs that can be reused as long-term frames | Eco-aware brands, gifting, décor rotations |
| Production and packing ease | How easily boxes fold, set up and store flat | Supplied flat with simple fold patterns | Crisp creases for clean lines | Sizes matched to standard shipping cartons | Bulk production runs, warehouse-friendly storage |
How to make cardboard shadow boxes for layered scenes and 3D stories
Many creative teams ask how to make cardboard shadow boxes that hold both printed layers and small objects without losing shape in transit. These projects often start with a Cardboard shadow boxes template that sets outer size, depth and the clear face area for artwork and objects. When the finished pieces need to travel in cartons again and again, teams usually line up frame sizes with cartons from Cardboard Boxes by Size and Shape so packing lines stay organised and repeatable. That alignment helps when sending multiple shadow box designs together, because the same outer footprint works for several themes.
Designers planning How to make a layered shadow box sketch each level separately, often using light card mock-ups to test how shadows fall and how the scene looks from normal viewing distance. This phase is where decisions about depth, spacer thickness and object placement are refined before any final print work begins. When the structure feels right, those concepts move into die-lines, print layers and production boards that can handle stacking, packing and handling through the full route.
Steps and tips for building a repeatable shadow box template
Building a stable template begins with the viewing rectangle and overall frame size, then adds allowances for edges, folds and backing. Cardboard shadow boxes diy prototypes are useful at this stage because they reveal how much depth is truly needed and where the frame might flex. This helps answer practical questions around How to make a shadow box that stays square, how to keep relief elements safe, and how to avoid pressure on the front cover.
People working through How to make 3D shadow box art also consider how different weights sit within the space. Very light items may only need adhesive, while heavier pieces might need slots, tabs or miniature platforms. Matching supports with cardboard grade keeps the structure sound, so the frame handles daily handling without warping corners or bowing sides.
Practical ideas for Cardboard shadow boxes diy and production runs
- Use plain-board mock-ups before committing to a full printed run
- Test several depths to see which level of shadow gives the best feel on a wall
- Mix printed backgrounds with small physical objects for richer stories
- Add simple borders that direct attention inward without distraction
- Design interchangeable layers so the same frame supports multiple themes
- Keep opening steps straightforward for both staff and end customers
- Base new designs on one or two proven Cardboard shadow boxes template sizes
Process checks when moving from sample to bulk order
- Confirm frame depth matches the most complex layered composition you plan to sell.
- Check how acrylic, clear film or open-face fronts work with the cardboard body.
- Make sure crease lines give sharp corners without cracking print or fibres.
- Verify hanging or standing hardware is appropriate for the loaded frame weight.
- Run a small shipment test with finished pieces to see how they handle transit.
- Confirm written instructions for any Cardboard shadow boxes diy kits reflect the real build steps.
- Lock in finishing options such as gloss, matte and spot UV, along with design support, shipping options and reliable turnaround times that keep projects on schedule.
| Aspect | Details | Material and structure choices | Finish and print choices | Add-ons and design support | Example applications |
|---|---|---|---|---|---|
| Depth planning | Distance between front and back of the frame | Different depths for low or high relief work | Printed depth cues or plain surrounds | Foam layers or inner card supports | Art prints with layers, small product displays |
| Layer alignment | How separate sheets and props line up in the frame | Tabs, slots or subtle reference marks | Guide lines on backing panels where needed | Layout diagrams and artwork templates | Collages, themed series, curated narrative scenes |
| Front protection | Clear cover that guards artwork and objects | Acrylic, clear film or open front | Anti-glare or high-clarity options | Peel-off protective films on clear elements | Retail-ready art, fragile mixed media compositions |
| Edge and corner control | Strength around the outer boundary of the frame | Reinforced folds, extra board at key points | Printed trims or single-colour edges | Corner buffers for longer or complex routes | Online art shipments, gallery transfers |
| Print story on outer walls | Brand or narrative elements printed around the frame | One colour, two colour or full colour artwork | Soft-touch, matte or gloss treatments | Spot UV on logos, titles or pattern details | Gift collections, themed campaigns, seasonal launches |
| Production flexibility | Ability to run different designs on shared sizes | Common die-lines for a set of artworks | Digital or offset print according to volume | Artwork reviews and fine adjustments | Art series, subscription drops, seasonal sets |
| Lead time and turnaround | How quickly finished boxes can be supplied | Schedules matched to volume and mix | Colour-consistent reprints for ongoing work | Reliable turnaround times for repeat cycles | New product launches, gallery events, online restock |
Design ideas for cardboard shadow boxes diy in retail and home settings
Cardboard shadow boxes diy projects appeal to home makers, small studios and independent brands that want layered displays without heavy framing. These boxes offer a light body, defined depth and enough print space to tell a story around the edges without overpowering the scene itself. People often search Cardboard shadow boxes free guides to test themes and compositions using spare board before moving into a full commercial run.
Many businesses that refine those ideas for retail align their ongoing box range through Custom Cardboard Boxes so outer sizes, inserts, frame depths and shipping cartons follow a consistent logic across products. This joined-up approach helps when combining Cardboard Shadow Boxes with other packaging styles such as gift packs, framed series or bundled accessories. Once core sizes and depths are chosen, new designs can be added without rebuilding the entire logistics plan.
How to make cardboard shadow boxes work across product ranges
When Cardboard Shadow Boxes become part of a wider packaging family, design teams look for flexible standards rather than one-off shapes. A common method is to keep external width and height stable while adjusting depth, window shape or printed storytelling. Another option is to base several ranges on the same Cardboard shadow boxes template and change only the inner layers, allowing fresh artwork while keeping die-lines and packing patterns steady.
Shadow Box Frame decisions also affect how pieces fit into homes, stores and gallery walls. Some collections focus on wall hanging, others on free-standing display, and some allow both by combining stand flaps with hidden hanging points. Testing these options during early Cardboard shadow boxes diy experiments makes the final production run feel natural for customers, who can move frames between spaces without extra hardware.
Ways to extend shadow box designs into a full packaging family
- Use shared outer footprints so frames align neatly on shelves and gallery walls
- Vary depth, window style and border graphics between themes and seasons
- Combine layered scenes with compartments that hold small coordinated products
- Add slip covers or sleeves that refresh long-running designs without new die-lines
- Build numbered series where each frame carries part of a larger visual story
- Pair Cardboard Shadow Boxes with flat packs or mailers for related product ranges
- Develop collections based on one or two proven Cardboard shadow boxes free formats
Steps for aligning shadow box packaging with supply and branding
- Map core product groups that can benefit from shadow box presentation, from art prints to keepsake sets.
- Decide which frame sizes should become long-term standards for height, width and depth.
- Confirm materials and board grades that support those standards in storage and transit.
- Align print finishes such as gloss, matte and spot UV with your broader visual identity.
- Plan artwork so hanging, standing and unboxing feel intuitive for the end user.
- Coordinate design support, high-quality printing options and shipping plans with your packaging partner.
- Keep clear records of successful sizes and layouts so fresh Cardboard shadow boxes diy ideas can grow into organised long-term ranges.
| Focus area | Detail | Structural choices | Print and finish choices | Added options and benefits | Example scenarios |
|---|---|---|---|---|---|
| Retail and gallery display | How frames present on shelves, walls or plinths | Hanging points, stand flaps, or switchable use | Single-colour trims or full artwork wraps | Flexible layout in store and at home | Art stores, bookshops, lifestyle retailers |
| Gifting and keepsakes | How Cardboard Shadow Boxes support personal stories | Deep frames to hold objects and mementos | Soft palettes or themed visuals | Space for messages, event dates or short notes | Memory pieces, event gifts, family collections |
| Collectible and series work | How several boxes connect as part of a long-running set | Shared sizes with varied depths and windows | Numbered editions or discreet series marks | Cohesive looks across whole collections | Limited runs, fandom collections, artist series |
| Online shipping and storage | How frames travel and wait before display | Stack-friendly bodies and guarded edges | Durable outer print suitable for handling | Inserts that keep contents aligned in each frame | E-commerce orders, pop-up shows, touring exhibitions |
| Sustainability approach | How material and design support recycling and reuse | Recycled fibre boards and simple fold styles | Water-based inks and measured ink coverage | Frames that remain in use long after purchase | Eco-aware ranges, thoughtful gifting |
| Production planning | How sizes, runs and reorders stay organised | Core sizes repeated across many artworks | Digital or offset routes as volumes change | Quick reprints and consistent colours for reorders | Ongoing retail supply, seasonal refresh cycles |
| Creative flexibility | How designers test and refine ideas before bulk orders | Prototype runs built on shared templates | Small-batch print tests and colour checks | Room to trial new Cardboard shadow boxes diy concepts | New product trials, collaborations, custom commissions |